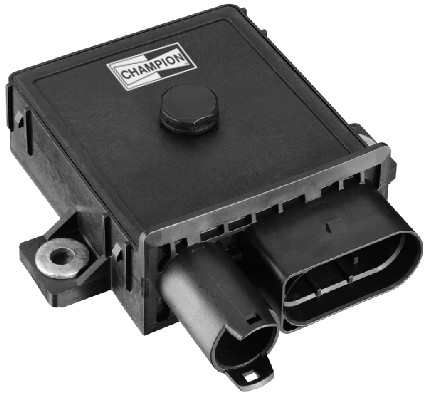
We all know how vital your glow plugs are for starting your diesel car, especially on cold mornings. But, don’t forget to pay attention to your glow plug control unit. Why? Well, how effective will your glow plugs be if your glow plug control unit isn’t working? So, if you suspect that your glow plug control unit isn’t working as it should be, it’s a good idea to replace it.
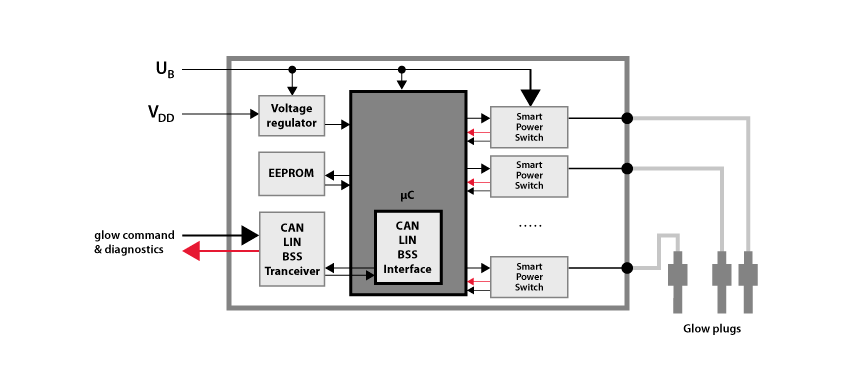
Before we talk about how to remove and install a new glow plug control unit, here’s a quick refresher on what a glow plug control unit does. It’s responsible for determining the timing, duration and electrical current needed by the glow plugs. This information is sent from the micro controller in the glow plug control unit via smart power switch to the glow plugs. So, when you turn on your diesel car, the glow plug controller analyses how much power the glow plugs need, for how long and when, before sending the needed power to the glow plugs. The electrical current heats the glow plugs up to 1300° Celsius to enable efficient combustion of your compressed fuel and air mixture. If everything is working, your engine starts.
Today, a glow plug is not just responsible for starting a diesel engine. It also stays on for a while after the engine has started in order to improve the smoothness and sound of the engine and the performance of the exhaust.
Possible symptoms of a faulty glow plug control unit or glow plug relay include: glow plugs not receiving power, glow plugs not staying on or the glow plug relay clicking rapidly.

How to remove and install a glow plug control unit
- Turn off the engine completely and remove the key. In some cars you might need to wait 10-15 minutes with the doors open to completely shut down the electronic system.
- Disconnect the negative battery cable from the battery if it doesn’t contradict the recommendations in your owners’ manual. Some car manufacturers do not recommend disconnecting the battery.
- Locate the glow plug control unit. Remove the air cleaner and place a clean rag over the intake.
- Disconnect the connector and bolts, and then disconnect the wires that lead to the glow plug harness. The glow plug control unit can now be extracted.
- If you are only replacing the glow plug relay, remove the remaining wires (after marking the terminals in which they belong). Then replace the old relay with your new one, double checking that all wires are connected properly.
- If you are replacing the entire controller, install it in the reverse manner that the old one was removed.

Useful tips and tricks
For repairs like this one, where you’re not sure if you can solve the problem by only changing one small part or if you’ll need to change multiple parts, you might find it easier to purchase more parts than you think you’ll need. That way you know you have everything you might need to hand, so won’t need to stop part way through the job due to a missing part. And, you can usually return the parts you don’t need as long you keep the receipt and the parts are in clean and undamaged packaging.
It’s also a good idea to have a clear diagram for the glow plug controller and relay to refer to during the repair. Check and double check that all your wires are correctly installed, as incorrect installation can damage the glow plug control unit.

The content contained in this article is for entertainment and informational purposes only and should not be used in lieu of seeking professional advice from a certified technician or mechanic. We encourage you to consult with a certified technician or mechanic if you have specific questions or concerns relating to any of the topics covered herein. Under no circumstances will we be liable for any loss or damage caused by your reliance on any content.