Installation steps for Standard Glow Plugs and Integrated Pressure Sensor Glow Plugs
Cars may have gotten more complex over the years, yet changing your vehicle's glow plugs is, in most cases, still a job that you can handle yourself.
However, before jumping into the job, you want to make sure you have a Manual Torque Wrench, and the right glow plugs for your vehicle. From advanced Integrated Pressure Glow Plugs to Standard Glow plugs, Champion®has you covered.
And with our different Glow Plugs come different Installation steps to follow. See below for our dedicated installation procedures.
- Section 1 covers all standard in build Glow Plugs. These are the Standard, Ceramic and Instant Start System Glow Plug.
- Section 2 covers the installation steps to follow for the Integrated Pressure Sensor Glow Plugs.
Now you know exactly where you're headed.
But before you start, here's important information you need to bear in mind: When replacing Glow Plugs: Keep to the Torques!
Section 1: Instructions for Glow Plugs (Standard, Ceramic and Instant Start System)
Removing the Old Glow Plugs
You're past the hood, you made it even further and you've cleared your way to the Glow Plug. Now is the time you need to manage the torque. Here is our step-by-step guide to removing the plug:
First off: Only remove and fit glow plugs using a manual torque wrench.
What must I do when the tightening Torque has been reached ?
Under no circumstances should you continue turning – the glow plug might otherwise break off. Instead, proceed according to the 3-point program: "Slightly loosen – Warm up – Unscrew":
1. Slightly loosen: Apply a generous amount of synthetic oil to the glow plug thread and leave to act, if possible over night, or longer.
2. Warming up: Run engine until it is warm or use a separate cable to supply current to the functional glow plugs for 4-5 minutes (only possible for glow plugs with 11 – 12 V operating voltage) - the glow plug will heat up and burn loose.
3. Unscrew: Then try to unscrew it once again and carefully loosen the glow plug out of the cylinder head with a suitable tool. (Do not exceed the maximum loosening torque. Always stop before reaching the tightening torque, if necessary try once again by heating up.)
After the old glow plugs have been removed, always clean the thread, the conical seat and the glow plug channel in the cylinder head with suitable tools.
Installing the New Glow Plugs
Tightening Torque
When screwing in new glow plugs, the tightening torque stated by the vehicle manufacturer must be observed at all times and performed with the appropriate reamer.
Note:
The tightening torque of the connecting nut must also be observed for glow plugs with screwed connection. Refer to the indications stated on the packaging of your Champion® Glow Plug for these product-specific indications.
In particular after baking (coking) between the glow rod and the cylinder head, the cylinder head bore is often soiled by residues from burning or dirt particles. Such coking can easily and safely be removed from cylinder heads with 10-mm threads.
Section 2: Instructions for Integrated Pressure Sensor Glow Plugs
Removing the Old Integrated Pressure Sensor Glow Plugs
In case of plug changes, special care is required in order to prevent damage to the highly sensitive sensor and to ensure the full functionality:
Beware:
A drop from just 2 cm height can damage the Integrated Pressure Sensor.
Only pull off the connector manually, to avoid the risk of plug damage.
Installation and removal only with the appropriate custom tool. Push the tool onto the Integrated Pressure Sensor Glow Plug so that the glow plug‘s hexagon head is completely covered; note the torque.
Only remove the protection cap after the installing the glow plug.
The right approach to removal:
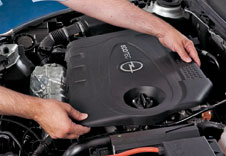 1. Remove the engine cover and the other components that impair access to the glow plugs . |
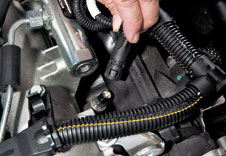 2. Manually disconnect the electrical connector on each glow plug. Important: when loosening the connector on do this manually, and do not use tools like pliers or similar. |
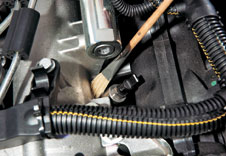 3. To ensure that no foreign bodies enter the combustion chambers, clean the area around the glow plug in question. |
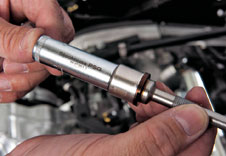 4. If the fuel system has been opened, also pay attention to cleanliness and seal the cables with a cap, if possible. |
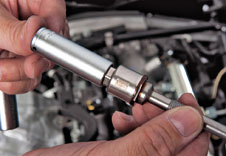 5. It is important to exclusively use the appropriate socket bit to loosen the Integrated Pressure Sensor Glow Plug; this avoids damage to the connector block. |
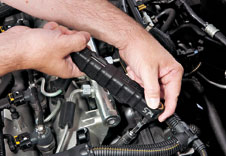 6. Important: Complete coverage of the plug hexagon head. Please use a torque wrench and note the permissible breaking torque. |
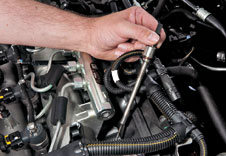 7. Remove the glow plug. |
Further Tips for a Glow plug-friendly installation
8. Before installing, coat the thread and shaft of the new plug with glow plug installation grease to avoid "caking" later on.
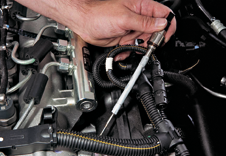 9. First clean the glow plug channel and the thread in the cylinder head to remove oil and combustion products. Then screw in the glow plug by hand. Important: Make sure that no dirt enters the combustion chamber. |
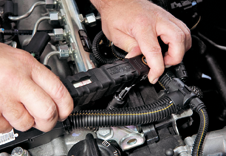 10. Tighten afterwards with a torque wrench (observe the installation torque!) fitted with the appropriate socket insert. Important: Complete coverage of the Integrated Pessure Sensor Glow Plug hexagon head. Now remove (and not before now!) the protective cap from the plug to avoid damage to the connector and mating connector. |
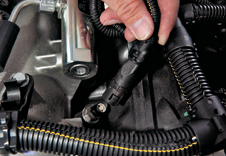 11. Push the wiring harness until it snaps onto the Integrated Pressure Sensor Glow Plug. |
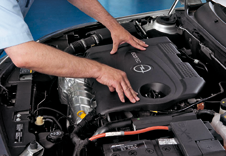 12. Install the engine cover and all other previously disassembled parts. |
13. At the end check the memory of the engine control unit for error code entries and delete them.
The content contained in this article is for informational purposes only and should not be used in lieu of seeking professional advice from a certified technician. We encourage you to consult with a certified technician if you have specific questions or concerns relating to any of the topics covered herein.